25 Creative Dollar Tree Easter Wreath DIY Ideas Under $25
If you’re looking to add a splash of spring to your home without breaking the bank, this $25 Dollar Tree Easter wreath DIY is just what you need. With some simple materials and a little creativity, you can craft a cheerful wreath that welcomes the season. Let’s dive in and get those creative juices flowing!
Crafting with Dollar Tree Foam Shapes
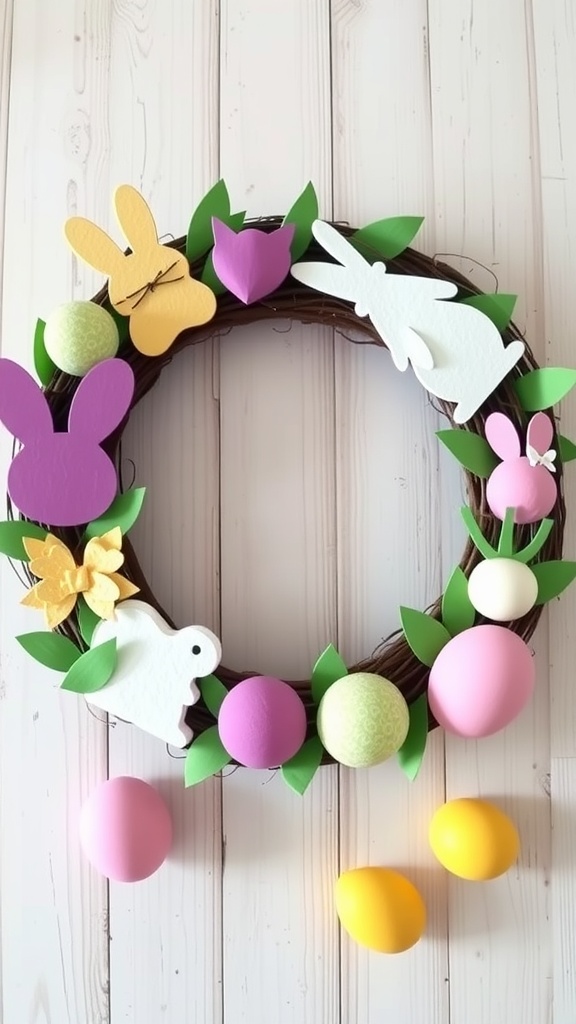
When it comes to decorating for Easter, using Dollar Tree foam shapes can really bring your ideas to life. The wreath featured in the image beautifully showcases how simple materials can create a festive atmosphere.
The wreath is adorned with colorful foam bunnies, flowers, and eggs, all of which are easily found at Dollar Tree. The vibrant colors add a cheerful touch and invite the spirit of spring right to your front door.
To make your own wreath, start by gathering foam shapes, a wreath base, and some craft glue. You can mix and match colors and shapes to create a design that speaks to you. Arrange your pieces on the wreath before gluing them down, allowing for adjustments.
Don’t forget to add some greenery to soften the look! The leafy accents in this wreath help tie everything together and create a cohesive design. Once everything is attached, hang your wreath with pride and watch it brighten up your space.
Colorful Egg Wreath Base
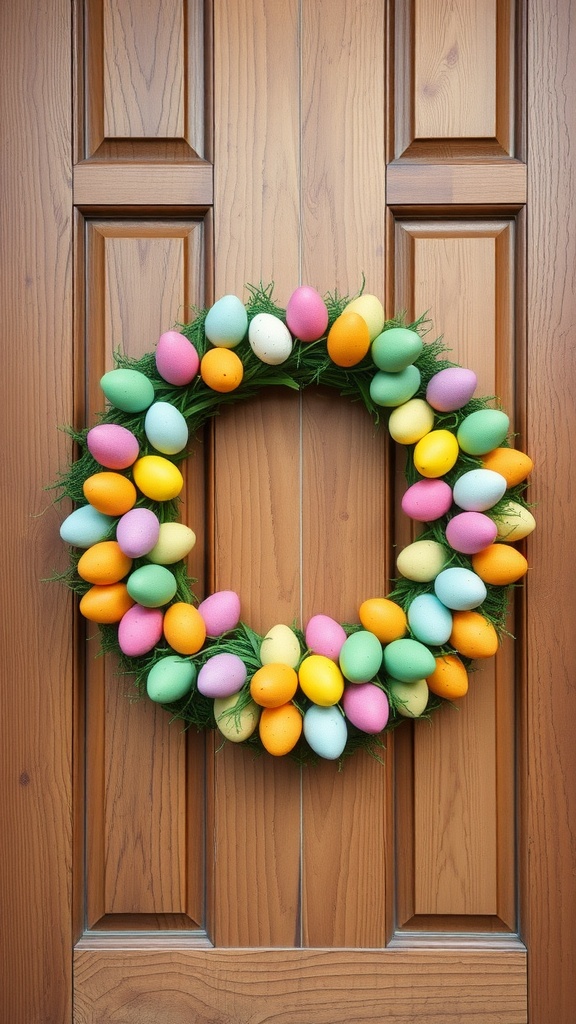
The colorful egg wreath featured in the image is a cheerful addition to any door this Easter season. It’s crafted with an array of pastel eggs that radiate the essence of spring. The colors include soft pinks, blues, yellows, and greens, creating a vibrant display that instantly brightens up the entrance.
This wreath is not only pleasing to the eyes but also easy to make. You can find all the materials at your local Dollar Tree, making it a budget-friendly project. Start with a simple circular base, and then arrange your eggs in a way that feels balanced and fun.
The addition of green faux grass around the eggs adds a natural touch, giving the wreath depth and texture. This element mimics the freshness of the season, symbolizing new beginnings. Hang it on your door or even display it indoors for a festive touch.
Using Dollar Tree Recycled Materials

Create a cheerful Easter wreath using materials from Dollar Tree. This DIY project is not only budget-friendly but also a great way to repurpose items. Recycled materials add a personal touch and reflect your style.
The wreath in the image features vibrant colors and textures, making it perfect for spring. The base is likely made from a simple foam or vine wreath form, easily found at Dollar Tree. The greenery and flowers, along with the cheerful ribbons, can also be sourced from their seasonal section.
Don’t forget to use leftover materials from previous crafts. Old ribbons and faux flowers can be transformed into beautiful decorations. A little creativity can go a long way in making your wreath unique!
Once your wreath is assembled, hang it in a visible spot to brighten your space. This project is a wonderful way to celebrate the season while being kind to your wallet and the environment.
Floral Accents with Dollar Tree Blooms
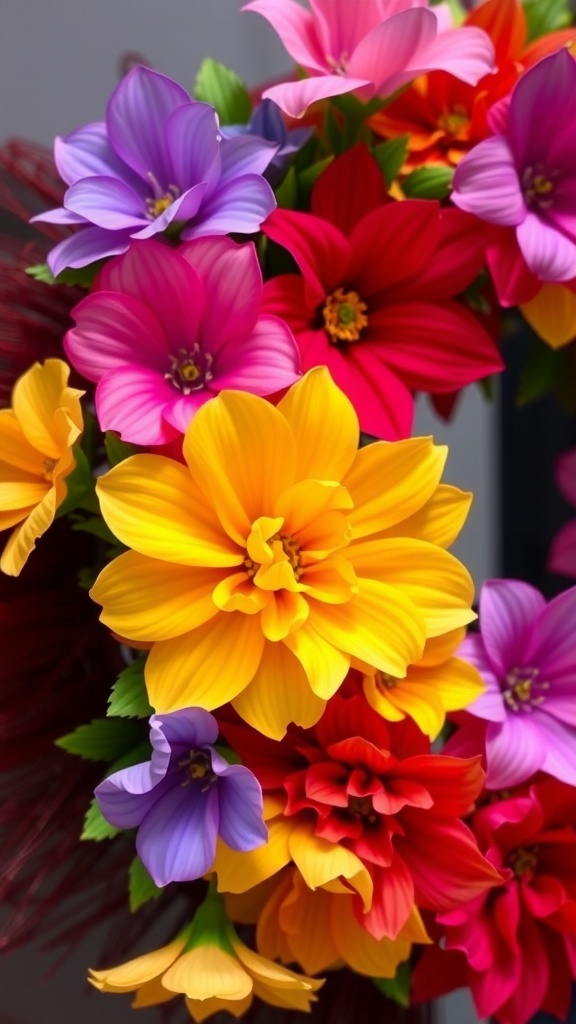
Creating a charming Easter wreath doesn’t have to break the bank. With vibrant blooms from Dollar Tree, you can easily add a splash of color to your spring decor. The image showcases a beautiful array of faux flowers in bright pinks, purples, yellows, and reds, perfect for bringing life to any wreath.
When selecting your blooms, look for a mix of colors and sizes to create depth. The bold shades in the image demonstrate how a combination of large and smaller flowers can enhance visual interest. These Dollar Tree flowers are perfect for layering and can help achieve a lush look without much effort.
To incorporate these blooms into your wreath, start by cutting the flowers to your desired lengths. Secure them into your wreath base using a hot glue gun. Arrange the flowers in clusters for a more dynamic appearance. Don’t hesitate to mix in some greenery for a fresh touch!
Using Dollar Tree blooms is not just budget-friendly but also a fun way to personalize your Easter wreath. With so many colors and styles available, you can create a festive decoration that reflects your style and welcomes spring into your home.
Bunny Ears and Tail Embellishments
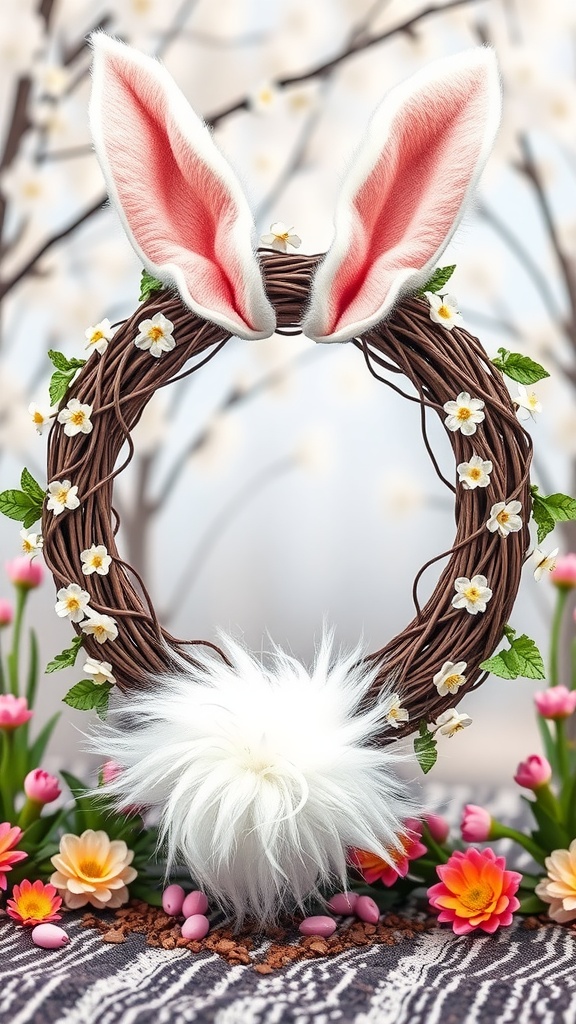
Creating the perfect Easter wreath can be a fun and creative activity. The bunny ears and tail embellishments give your wreath a playful touch. In the image, you see a charming wreath featuring soft, pink-lined bunny ears that add a festive vibe. These ears stand tall and proud, making it clear that this is a cheerful decoration for spring.
Along with the ears, the fluffy white tail at the bottom is an adorable addition. It mimics a real bunny’s tail and adds a delightful texture. Surrounding the wreath are lovely flowers that enhance the overall look, making it appear fresh and inviting.
To make your own version, you can easily find bunny ear decorations and fluffy tails at your local craft store, often for a very low cost. This DIY project not only allows you to personalize your home decor but also brings a smile to anyone who sees it. Gather your materials, and let your creativity shine!
Personalized Name Sign for the Wreath
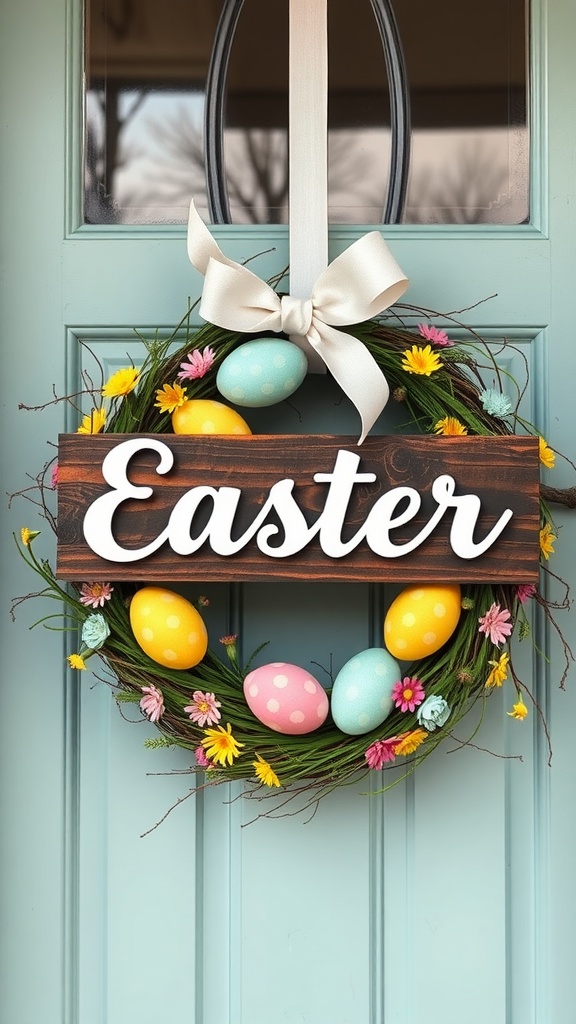
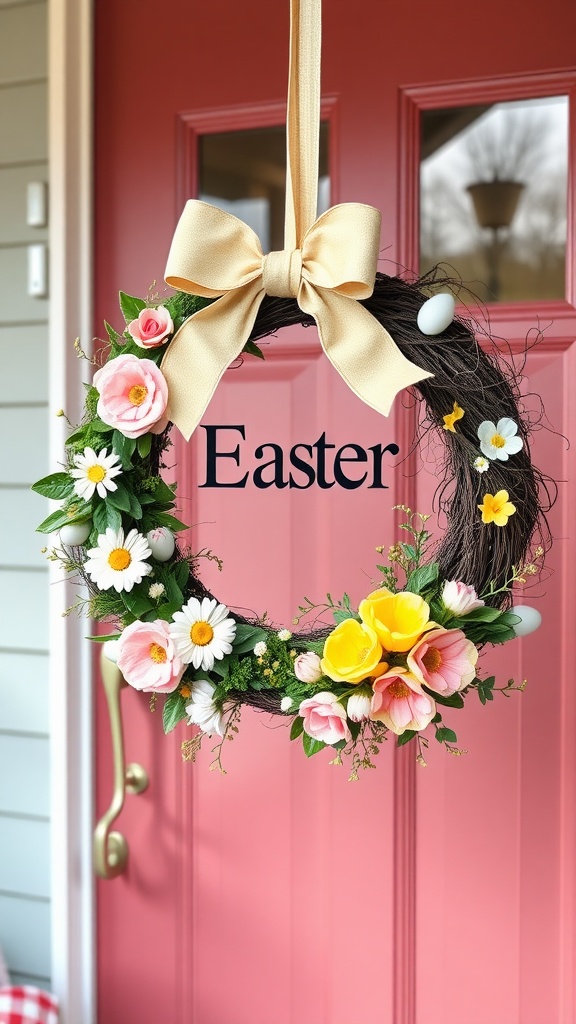
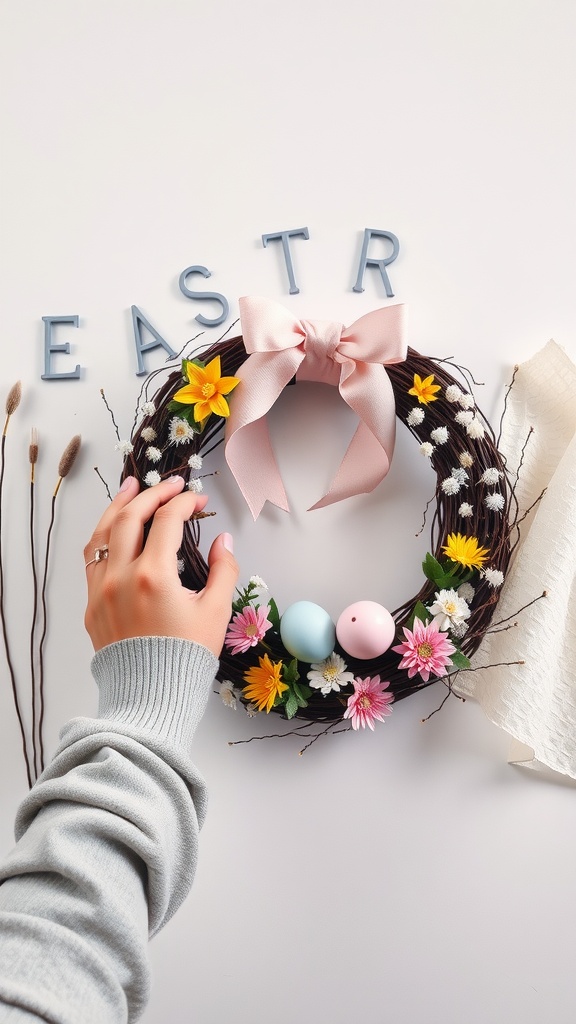
Adding a personalized name sign to your Easter wreath is a lovely touch that makes it uniquely yours. The image shows a beautiful wreath adorned with pastel-colored eggs and cheerful flowers, topped off with a wooden sign that reads ‘Easter’. This can be a perfect starting point for your custom sign.
To create your own name sign, you can use simple materials like a piece of wood or a sturdy cardboard. Paint it in a color that complements the wreath. White lettering stands out nicely against darker backgrounds. You can use stencils for a neat finish or even your own handwriting for a more personal feel.
Once your sign is ready, attach it to the wreath using a ribbon or hot glue. Make sure it’s secure so it can withstand the elements if hung outdoors. This addition makes your Easter wreath not just decorative, but also a warm welcome to family and friends during the holiday season.
Pastel Ribbons for a Cheerful Touch

When it comes to creating a cheerful Easter wreath, pastel ribbons are a delightful addition. They bring a soft, inviting vibe that instantly brightens up any space. In the image, you can see lovely pink ribbons gracefully tied around the wreath, enhancing its fresh look.
The choice of pastel colors complements the greenery and flowers beautifully. This combination creates a harmonious balance that feels both elegant and playful. The ribbons are not just decorative; they help to frame the wreath and draw attention to its lovely details.
Using pastel ribbons is an easy way to elevate your DIY project. Whether you opt for wide satin ribbons or thinner ones, each style can add a unique touch. Plus, you can easily find these materials at your local dollar store, making it budget-friendly!
Incorporating pastel ribbons into your wreath design invites warmth and joy into your home. It’s a simple yet effective way to celebrate the season and welcome guests with a cheerful spirit. So, gather your materials and let your creativity shine!
Spring-Themed Color Palette
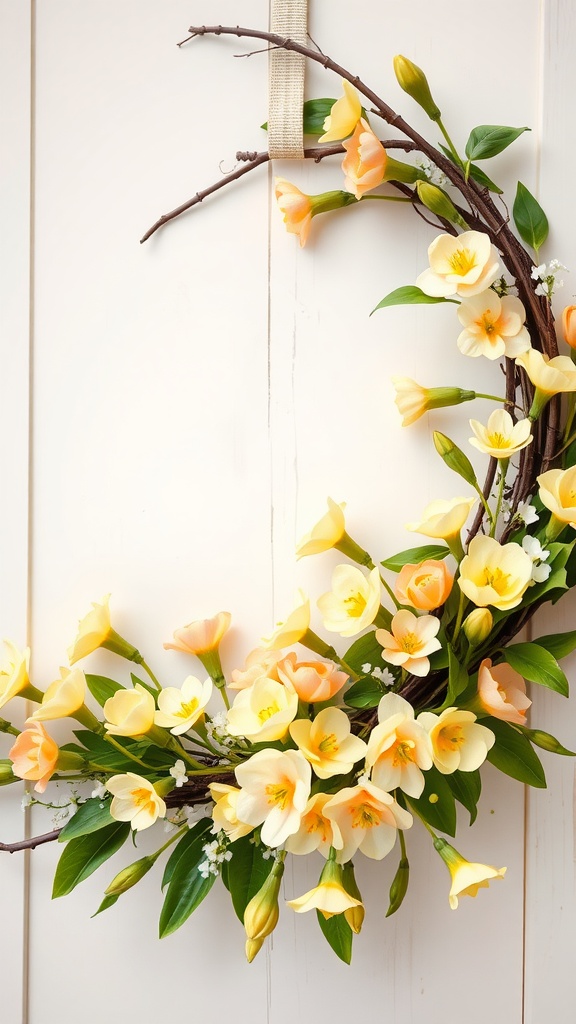
The Spring-themed color palette is all about soft pastels and fresh hues that bring a cheerful vibe to your DIY Easter wreath. The image captures a lovely arrangement of yellow and peach flowers, perfectly embodying the essence of spring. These colors are not only pleasing to the eye but also evoke feelings of warmth and renewal.
Using shades of yellow, peach, and soft greens, you can create a wreath that feels light and airy. These colors blend beautifully with the natural elements, like the twig base of the wreath. This palette allows you to connect with nature and celebrate the blossoming season.
When making your wreath, consider using similar pastel flowers or greenery. You can find various faux flowers at your local craft store that fit this theme. The combination of these colors can uplift your space and give a welcoming touch to your home during Easter.
Egg-Centric Decorations for a Festive Feel
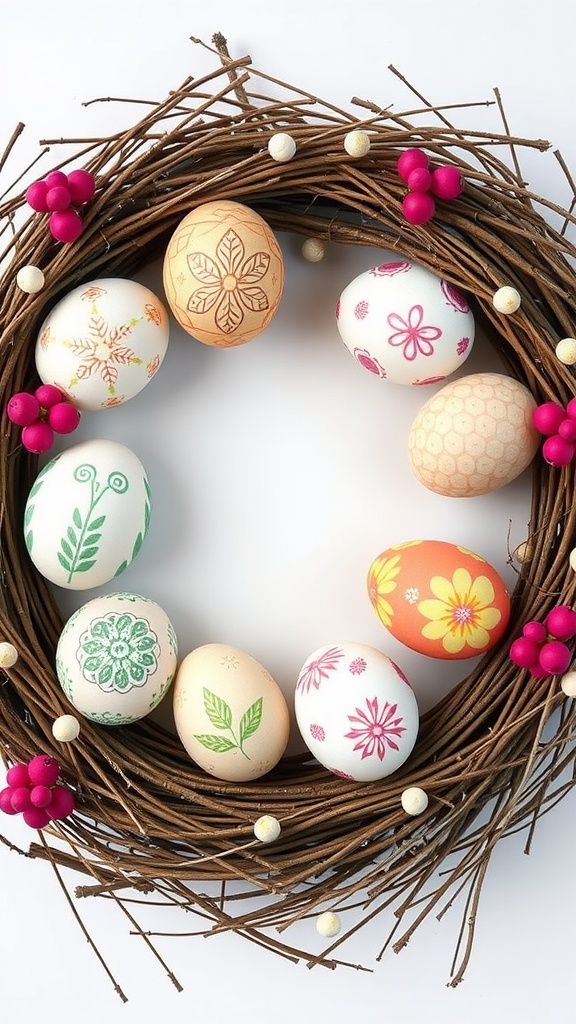
This delightful wreath is all about celebrating the Easter spirit with colorful egg designs. Each egg is uniquely decorated, showcasing vibrant patterns that instantly attract attention. The use of pastel and bold colors adds a cheerful touch to your home decor.
The wreath is made from natural twigs, giving it an earthy vibe that complements the bright eggs beautifully. Surrounding the eggs are small decorative berries, adding extra layers of color and texture. This simple yet charming decoration can be created with materials from your local dollar store, making it budget-friendly.
Creating this wreath is a fun project suitable for all ages. Gather your family or friends, and enjoy decorating the eggs together. You can use markers, paints, or even stickers to personalize each egg. Hang this wreath on your front door or inside your home to spread festive cheer throughout the season.
Layering Techniques for Depth
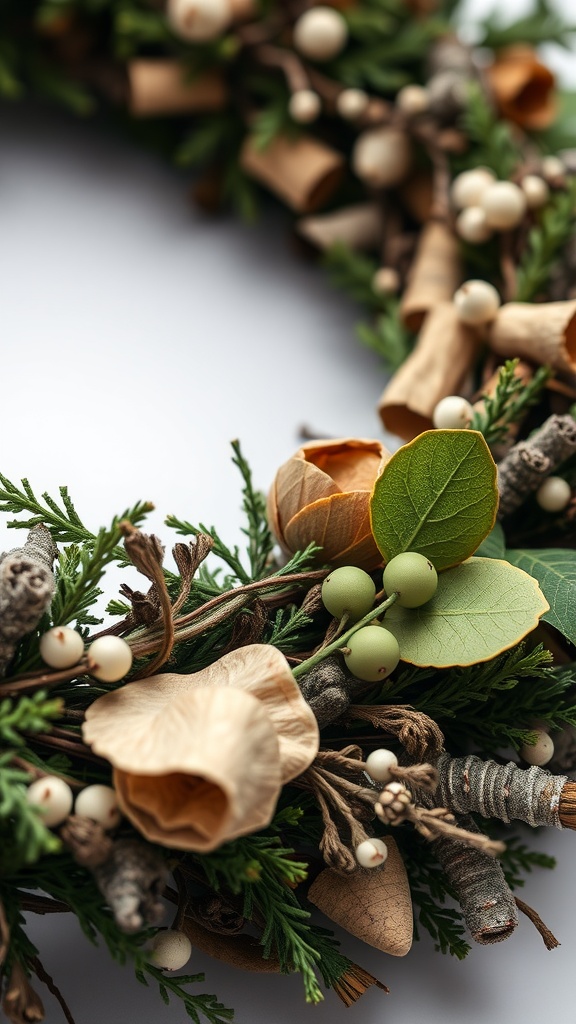
Creating a beautiful Easter wreath doesn’t just stop at choosing the right base. Layering is a key technique that adds depth and visual interest to your design. The image above showcases a lovely arrangement of natural elements, which is a perfect example of how to achieve this.
Start by selecting various materials like greenery, dried flowers, and decorative accents. In the image, you can see a mix of textures, from the soft leaves to the delicate petals. This variety instantly draws the eye and keeps the wreath looking lively.
When layering, begin with larger pieces at the back. This sets a solid foundation for your wreath. As you move forward, add smaller items to create layers that peek through. Notice how the berries and leaves in the picture add a pop of color and contrast against the earthy tones. This thoughtful arrangement enhances the overall look.
Don’t forget to play with different heights and shapes! The unique forms of the elements in the image help create a dynamic appearance. By mixing rounded and elongated features, you can achieve a well-rounded design that feels balanced and inviting.
Lastly, step back often as you work. This allows you to see how the layers come together. Adjusting elements will help you find that sweet spot where every piece complements the others. With these layering techniques, your Easter wreath will not only look beautiful but also showcase your creativity.
Creating Texture with Moss and Foliage
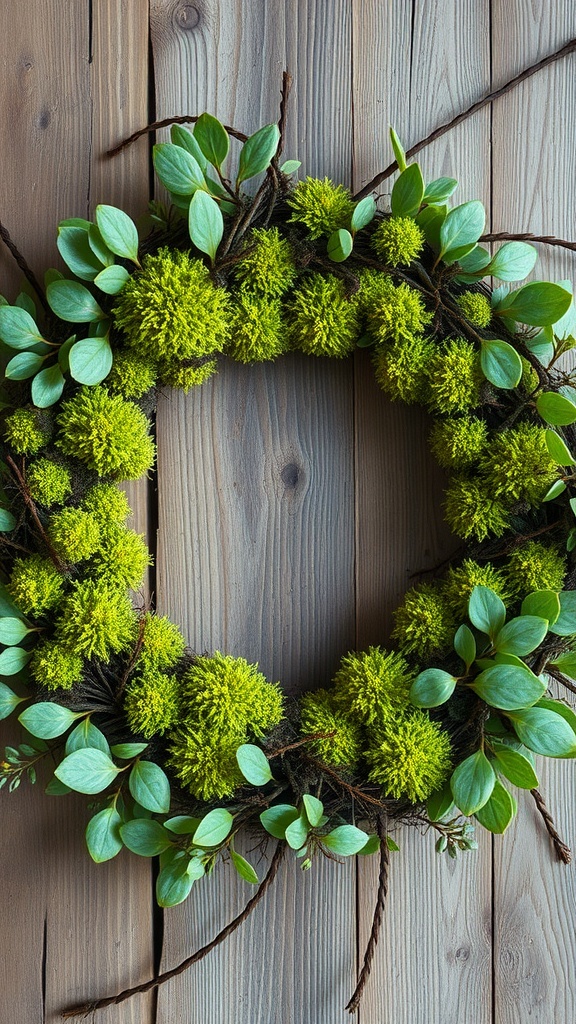
When making your $25 Dollar Tree Easter wreath, adding texture is key to making it stand out. Moss and foliage are perfect for this. Just look at how the bright green moss pops against the muted wood background in the image!
The fluffy moss balls create a lively feel, drawing attention and inviting touch. Pairing this with the smooth, shiny leaves adds depth, making your wreath not just a visual treat but a tactile one too.
To start, gather some faux moss from your local craft store. It’s usually inexpensive and comes in different shades of green. You’ll also want some faux leaves to balance out the texture. The combination of rough moss and soft leaves really gives your wreath a rich, layered look.
Consider using these materials in clusters. Placing moss in groups brings more life to your wreath, while the leaves can be arranged around it for a natural feel. The mix of textures will make your wreath truly eye-catching.
So grab your supplies, and let’s create something lovely!
Seasonal Transition Elements
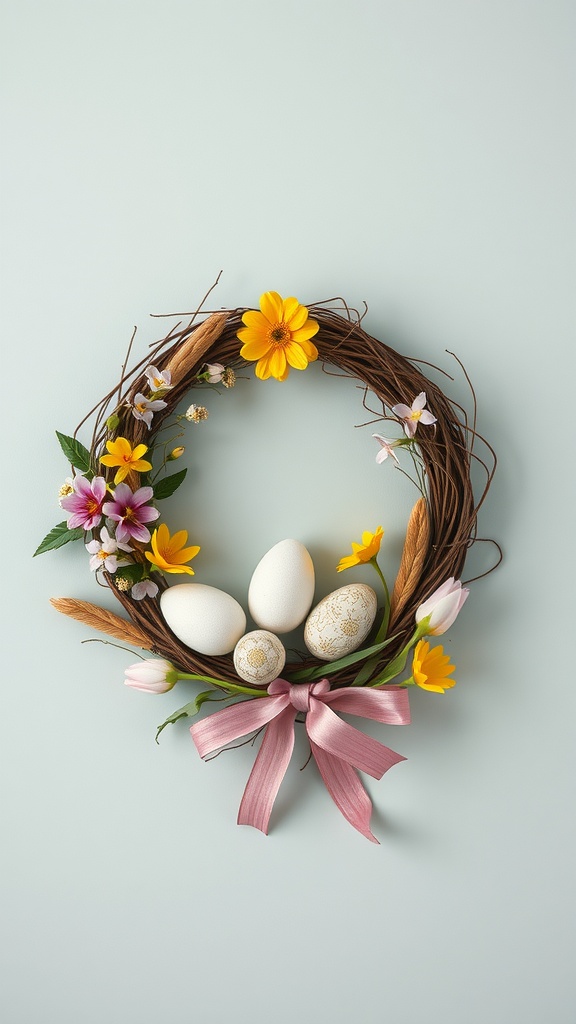
As Easter approaches, crafting a wreath becomes a fun way to mark the seasonal transition. The wreath depicted in the image combines natural elements with festive touches, making it a charming addition to any home.
The use of a grapevine base provides a rustic feel, while bright flowers and decorative eggs bring a celebratory vibe. These elements symbolize new beginnings, which is perfect for spring.
The soft pink ribbon tied in a bow adds a touch of elegance, creating a lovely focal point. It’s a simple idea that showcases the beauty of the season, blending vibrant colors with neutral tones.
To create your own Easter wreath, gather some faux flowers, decorative eggs, and a grapevine wreath. You can customize it with your favorite colors and styles. This DIY project is a delightful way to usher in the joys of spring!
Double-Sided Wreath Designs
Creating a double-sided Easter wreath adds versatility to your seasonal decor. This design allows you to showcase vibrant colors and cheerful elements on both sides, making it visible from different angles.
The wreath in the image features beautiful artificial flowers and a lovely bow. The pastel shades, like soft pinks and yellows, evoke the spirit of spring. The subtle greenery blends well, giving it a natural look.
To make a similar wreath, gather some craft supplies from your local Dollar Tree. You’ll need a foam or vine wreath base, faux flowers, ribbons, and some decorative eggs. Arrange the flowers evenly, ensuring both sides are visually appealing.
Once assembled, hang your wreath on a door or even in a window. This design not only celebrates Easter but also adds a touch of spring charm to your home.
Wreath Frame Options from Dollar Tree
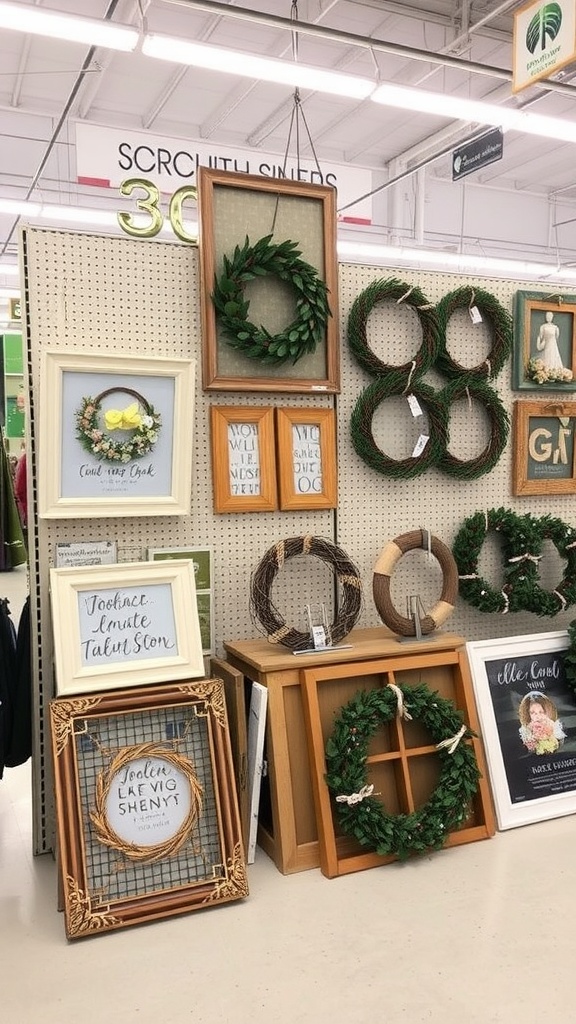
If you’re diving into a DIY Easter wreath project, the first step is to pick the right frame. Dollar Tree offers a delightful variety of wreath frames that can fit any style you’re going for.
In the image, you can spot several unique frame options, from traditional round wreaths to more modern square shapes. The round frames are classic and perfect for floral arrangements, while the square ones can give a fresh twist to your design.
Some of these frames are adorned with greenery, making them an excellent backdrop for your Easter decorations. You can easily modify them with additional embellishments to add your personal touch. Plus, the price point is hard to beat, making it a friendly option for your wallet.
Whether you’re looking for a simple base to build upon or a more decorative frame to start with, Dollar Tree’s selection is sure to inspire your creativity. So, gather your supplies, and let’s craft something beautiful for this Easter season!
Adding Glitter for a Sparkling Effect

Adding glitter to your Easter wreath is a fun way to bring some sparkle to your decor. The image showcases a beautifully crafted wreath adorned with shimmering balls and lights that catch the eye and add a festive touch.
To achieve this look, start by selecting a mix of decorative balls in various sizes and shades. Look for those with a glittery finish to enhance the shining effect. As you arrange these on your wreath, consider spacing them out to allow the lights to shine through.
Once you have your balls in place, sprinkle some fine glitter over the wreath. This extra layer of sparkle will catch the light beautifully. For a cohesive look, choose a glitter color that complements your wreath’s color scheme.
Don’t forget to add some twinkling lights! The warm glow from the lights will reflect off the glitter, creating a cozy and inviting atmosphere. Hang your wreath where it can shine brightly, and watch as it transforms your space.
Incorporating Pom-Poms for Fun
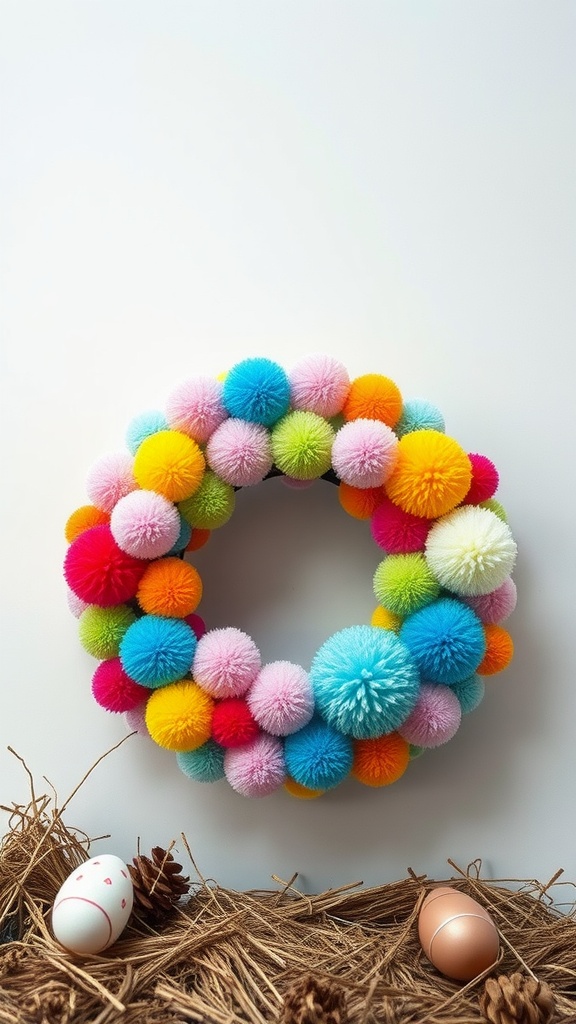
Adding pom-poms to your Easter wreath is a delightful way to bring color and texture to your spring decor. These soft, fluffy balls come in a mix of bright shades, making your wreath eye-catching and playful.
The wreath in the image showcases a variety of pom-poms in pinks, yellows, blues, and greens, creating a cheerful vibe. This design is not only visually appealing but also a fun project to take on, especially if you enjoy crafting with your family or friends.
To create a similar look, start by gathering your materials: a wreath base, colorful pom-poms, and a hot glue gun. Simply attach each pom-pom to the base, filling in gaps and layering for dimension. This method is easy and allows for plenty of creativity!
Once your wreath is complete, it becomes a lovely focal point for your home. Hang it on your front door or display it inside to brighten up your space during the holiday season. The pom-poms add a whimsical touch that embodies the spirit of Easter.
Creating a Ribbon Bow Focal Point
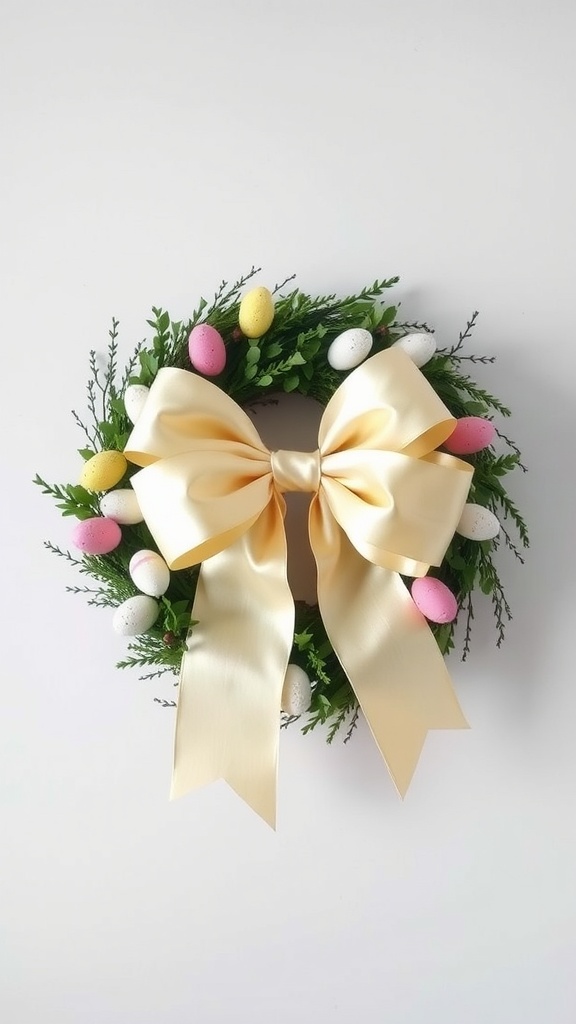
Adding a ribbon bow to your Easter wreath is a fun way to create a focal point. The bow draws attention and adds a touch of charm. A simple, large bow can make all the difference, transforming your wreath into a standout piece.
For this project, you can use a soft pastel ribbon that complements the colors of the eggs in the wreath. The light yellow ribbon, like in the image, pairs beautifully with the pink and yellow eggs, enhancing the overall look.
To make the bow, cut a generous length of ribbon. Create loops and secure them in the center with a twist tie or some wire. Make sure the loops are even and fluffy. Once your bow is ready, attach it to the bottom center of the wreath using hot glue or by weaving the ends into the greenery.
This simple addition can elevate your DIY decor. Plus, it’s a great way to showcase your crafting skills while celebrating the Easter season!
Incorporating Miniature Bunnies and Chicks
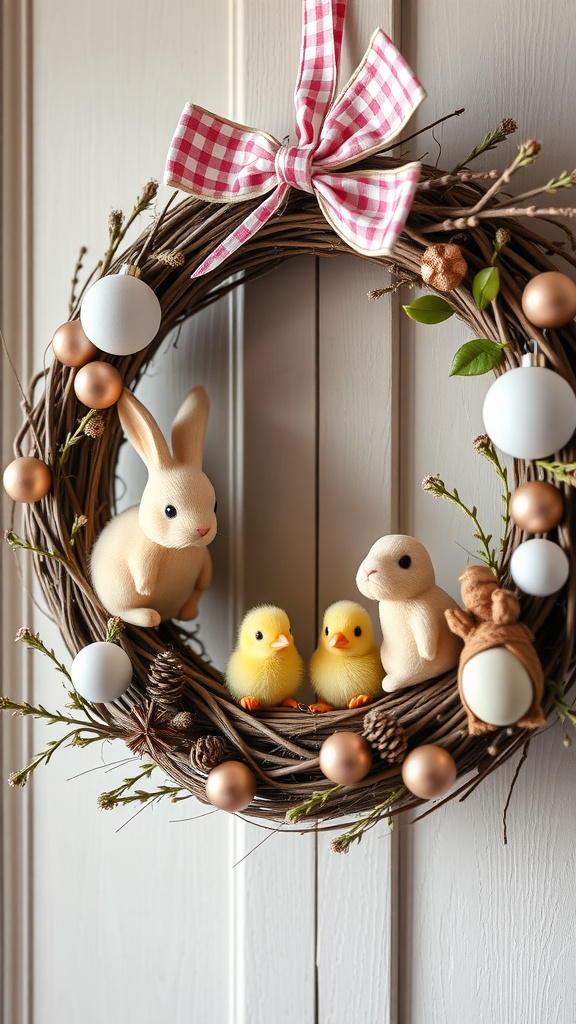
Adding miniature bunnies and chicks to your Easter wreath creates a playful and festive vibe. These little creatures remind us of spring and make the decoration feel lively. Choose soft, plush bunnies and bright yellow chicks to bring a cheerful touch.
When placing these figures, think about balance. You can cluster them together or spread them out along the wreath. This allows for a more dynamic look. Consider using different sizes for added visual interest.
Don’t forget to include other elements, like pastel-colored eggs or greenery, to complement the bunnies and chicks. This blend of colors will enhance the overall appearance, making your wreath eye-catching.
Finally, secure everything in place with hot glue. This will ensure your adorable additions stay put for the whole season. Enjoy crafting a wreath that captures the spirit of Easter!
DIY Instructions for Beginners
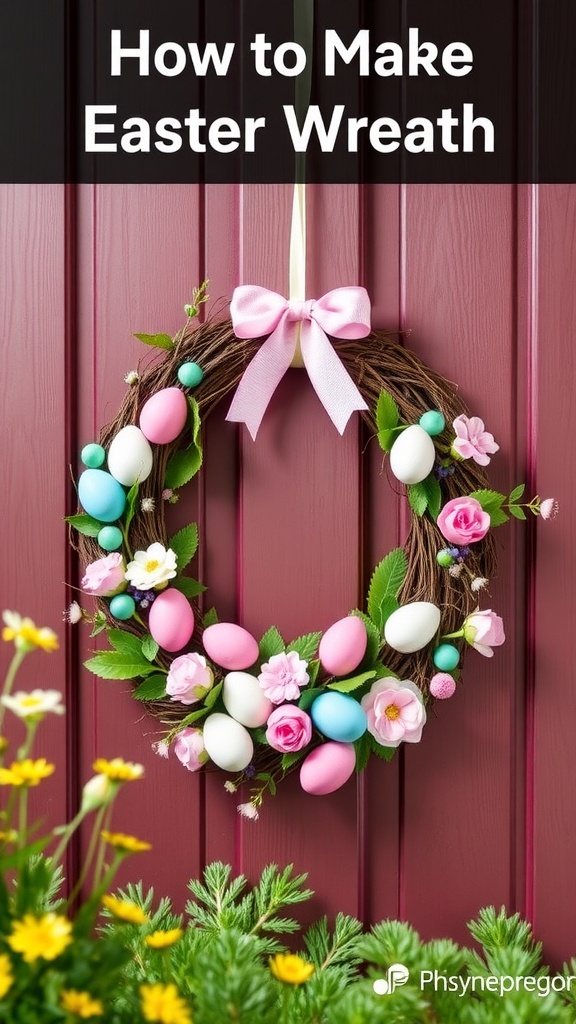
Making a delightful Easter wreath can be a fun project for anyone, even if you’re just starting out. The image shows a lovely wreath decorated with pastel eggs, flowers, and greenery, all arranged beautifully on a wooden background.
This project is not only simple but also allows you to personalize your wreath to fit your style. You can find most supplies at your local Dollar Tree, making it budget-friendly.
Begin by gathering your materials. You’ll need a grapevine wreath base, faux flowers, pastel eggs, and a ribbon for hanging. Don’t forget some hot glue or floral wire to secure everything in place.
Start by attaching the flowers. Position them around the wreath, using glue to secure them as you go. Next, add the eggs in similar fashion, mixing colors for a cheerful look. Finally, tie a pretty bow with your ribbon and attach it at the top. Hang your creation proudly!
Utilizing Floral Wire for Stability
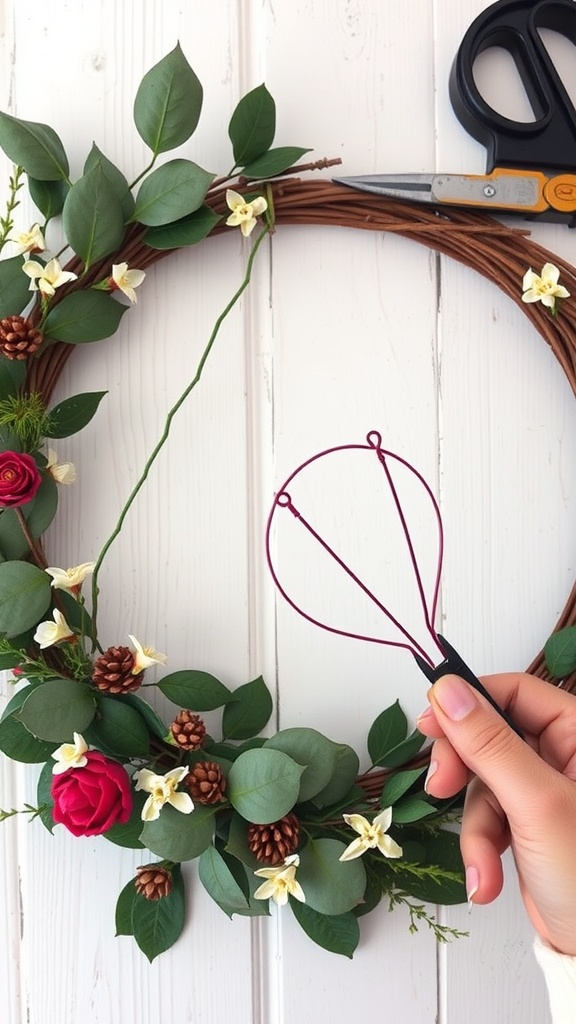
Adding stability to your Easter wreath is key to ensuring it looks good throughout the season. In the image, you can see some floral wire and scissors, which are essential tools for this step. Floral wire is especially handy because it is flexible yet strong enough to hold various elements of your wreath in place.
Start by cutting the floral wire into manageable lengths. These pieces will help secure your faux flowers and greenery, preventing them from shifting out of place. Simply weave the wire around the stems of the decorations and the base of the wreath. This method keeps everything anchored while you create your design.
As you arrange your flowers, keep an eye on balance and symmetry. Adjust the wire as needed to keep everything looking neat. The floral wire is often overlooked, but it truly plays a crucial role in maintaining the overall structure of your wreath, especially as you add more elements. Remember, a little bit of wire goes a long way!
Finding Inspiration from Nature

When creating a wreath for Easter, nature can be a fantastic source of inspiration. The image shows a wreath adorned with beautiful flowers and leaves, celebrating the vibrant colors of spring. The soft peach and pink blooms, along with the lush greenery, immediately evoke feelings of renewal and joy.
Using natural elements in your DIY projects adds a personal touch. You can gather flowers and foliage from your garden or local parks, or even opt for artificial ones from your favorite craft store. Mixing different textures and colors can help create a unique look that reflects your style.
This wreath not only serves as a decoration but also symbolizes the beauty of the season. Incorporating materials from nature reminds us of the life and growth happening all around us. So, let your surroundings inspire your Easter wreath design!
Seasonal Themes Beyond Easter
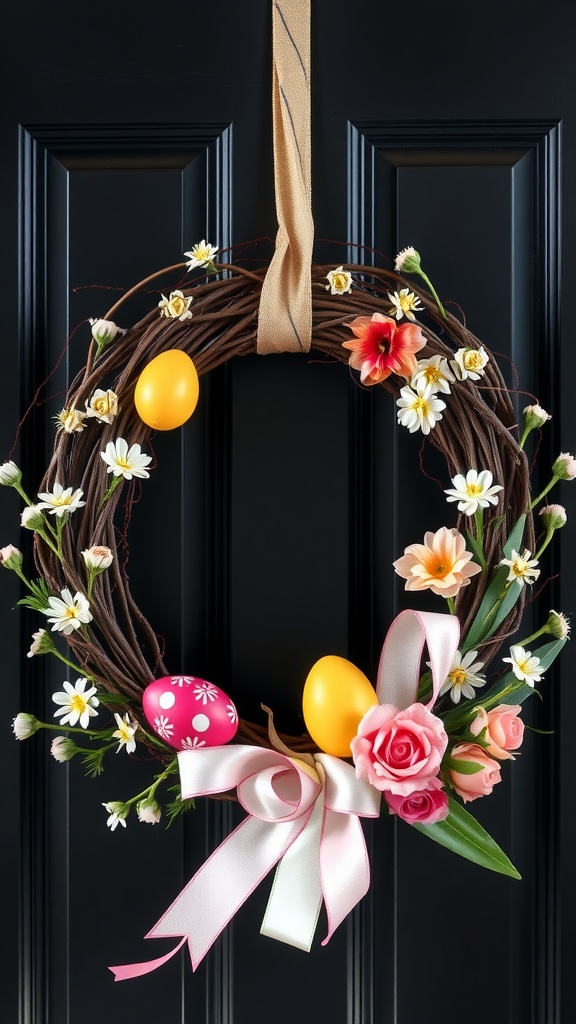
This lovely wreath captures the spirit of spring, making it a delightful addition to any home. While it’s designed for Easter, the vibrant colors and cheerful flowers give it a versatility that can be enjoyed throughout the season.
The wreath features a mix of beautiful artificial flowers, including roses and daisies, paired with colorful Easter eggs. The pink and yellow hues add a fresh touch, perfect for welcoming warmer weather. The soft ribbon adds an elegant finish, making it a charming piece for your front door.
Beyond Easter, consider transforming this wreath for other seasons. For instance, in the summer, you can swap out the decorations for sunflowers and seashells, giving it a beachy vibe. In the fall, adding leaves and pumpkins can create a cozy autumn look. This adaptability allows you to enjoy your DIY project all year round.
Using Paint to Customize Decorations
In our DIY journey, paint is a simple yet fun way to add a personal touch to your Easter wreath. From vibrant colors to soft pastels, the choice is all yours. The image shows a wreath adorned with colorful flowers and pastel eggs, which can easily be enhanced with a splash of paint.
Start by selecting your favorite colors that resonate with the Easter theme. You can paint the eggs in bright shades or even create patterns for a unique look. The flowers can also be painted to match or contrast with the eggs, giving your wreath a cohesive feel.
As shown in the image, the use of a soft pink ribbon adds a charming detail. You can either leave it as is or paint it for a more customized appearance. Just make sure the paint is suitable for fabric if you choose to go that route.
Once you have painted your decorations, allow them to dry completely before assembling your wreath. This ensures that everything sticks well and looks neat. Painting not only enhances your wreath but also lets your creativity shine!
Creative Ways to Hang Your Wreath

Hanging your DIY Easter wreath can be just as fun as making it! There are several creative methods to display your beautiful creation. Each method can add a unique touch to your entryway.
One simple way is to use a decorative ribbon. A vibrant ribbon can enhance the look of your wreath while providing a sturdy way to hang it. You can loop it over your door and let the wreath dangle freely, adding a pop of color and charm.
An alternative is to use a wreath hanger. These come in various styles and colors, allowing you to match them with your wreath’s theme. Just place the hanger over the top of your door, and you’re all set!
If you’re feeling a bit more adventurous, consider using a command hook. Simply stick the hook to the door, and hang your wreath from it. This method is especially useful if you want to avoid marks on your door.
Lastly, for a more rustic vibe, try hanging your wreath from a nail or a screw. This can create a lovely, homey feel. Just remember to choose a discreet location if you’re concerned about aesthetics.
Final Touches for a Polished Look
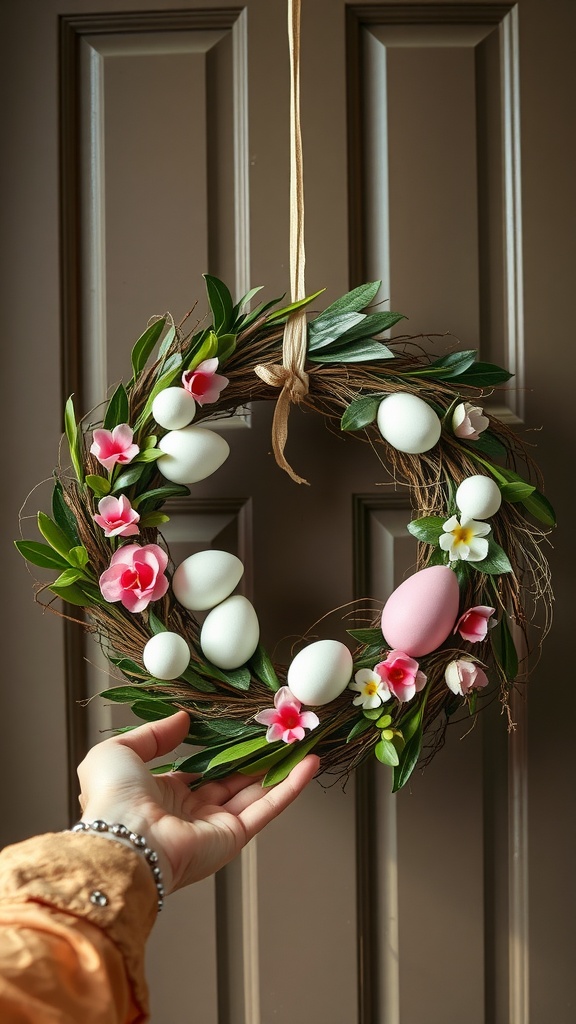
Creating a beautiful Easter wreath can be a fun and rewarding project. In the image, we see a lovely wreath adorned with a variety of decorative elements. The wreath features a mix of artificial flowers and eggs, set against a natural grapevine base. This combination not only adds color but also gives it a fresh spring vibe.
As you put the final touches on your DIY project, think about the balance of colors and shapes. The white and pink eggs stand out beautifully next to the greenery and flowers. You can adjust the placement of these elements to create visual interest and ensure everything feels harmonious.
Don’t forget about the finishing details! A simple ribbon or bow can add elegance to your wreath. In the image, a soft ribbon is used to hang the wreath, tying all the elements together nicely. Consider choosing a ribbon that complements the colors in your wreath for that extra flair.